Creating a Planter for Herbs
It Feels Like Home!

Creating a Planter for Herbs: DIY Ideas and Steps
Creating a Planter for Herbs, having fresh herbs readily available can elevate your cooking and add a touch of greenery to your home. Whether you have a spacious garden or a small balcony, creating a planter for herbs is a rewarding project that can be done easily with a few basic materials and some creativity. Here’s a comprehensive guide to help you get started.
Benefits of Growing Herbs in Planters
Growing herbs in planters has numerous advantages:
- Convenience: Having herbs close at hand makes it easy to add fresh flavors to your meals.
- Control: Planters allow you to control the soil quality and drainage, ensuring optimal growing conditions.
- Space Efficiency: Planters are perfect for small spaces, allowing you to grow a variety of herbs even in limited areas.
- Aesthetics: Planters can enhance the beauty of your outdoor or indoor space with lush, green foliage.
Choosing the Right Herbs
When selecting herbs to grow in your planter, consider your culinary preferences and the growing conditions you can provide. Some popular herbs that thrive in planters include:
- Basil
- Mint
- Thyme
- Parsley
- Cilantro
- Chives
- Oregano
- Rosemary
Materials Needed
To create a planter for herbs, you’ll need the following materials:
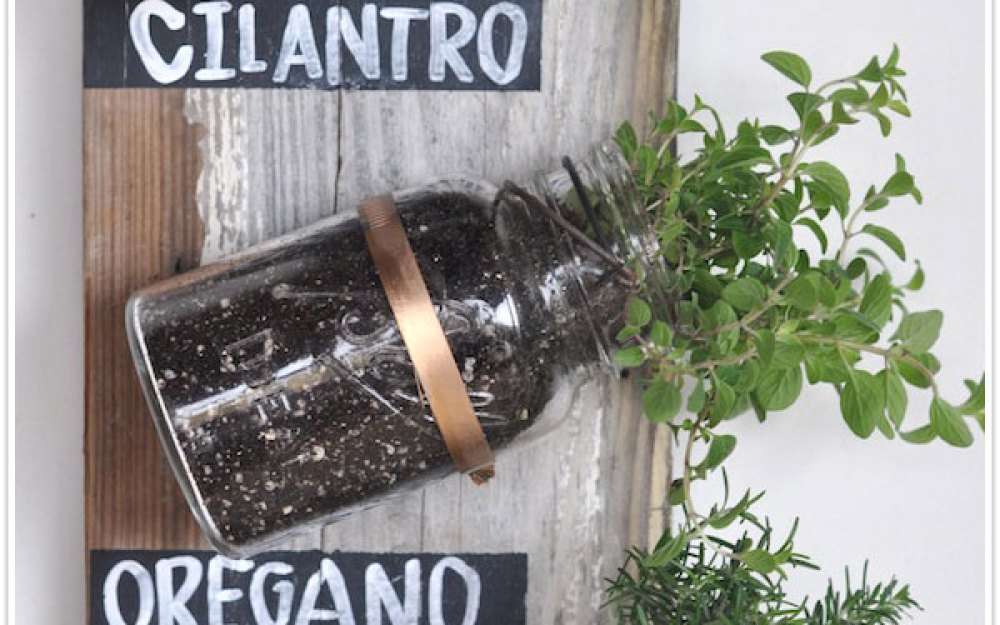
- Planter: Choose a container with good drainage. This can be a traditional pot, a wooden box, a hanging basket, or even a repurposed item like an old colander.
- Potting Soil: Use a high-quality potting mix that drains well.
- Herb Seeds or Seedlings: Purchase seeds or young plants from a nursery or garden center.
- Watering Can: For regular watering.
- Labels: Optional, to keep track of which herbs are planted where.
Step-by-Step Instructions
Select the Planter:
- Choose a container that is at least 6-8 inches deep to allow ample root growth.
- Ensure the planter has drainage holes to prevent waterlogging.
Prepare the Soil:
- Fill the planter with potting soil, leaving about an inch of space at the top.
- Mix in some perlite or sand to improve drainage if necessary.
Plant the Herbs:
- If planting seeds, follow the instructions on the seed packet for depth and spacing.
- If planting seedlings, dig a small hole for each plant, place it in the hole, and gently firm the soil around the roots.
Water the Herbs:
- Water the soil thoroughly after planting to help the herbs establish.
- Keep the soil consistently moist but not soggy.
Place the Planter:
- Find a sunny spot for your planter, as most herbs need at least 6 hours of sunlight daily.
- If growing indoors, place the planter near a south-facing window or under grow lights.
Care for the Herbs:
- Watering: Water regularly, allowing the soil to dry slightly between waterings.
- Fertilizing: Feed with a balanced, water-soluble fertilizer every 4-6 weeks.
- Pruning: Regularly pinch back the tips of the herbs to encourage bushy growth and prevent them from becoming leggy.
- Pest Control: Monitor for pests and treat with natural remedies like neem oil if necessary.
Creative Planter Ideas
- Vertical Garden: Use a vertical planter or hanging pockets to save space and create a stunning visual effect.
- Herb Tower: Stack multiple planters in a tower formation to grow more herbs in a compact area.
- Repurposed Containers: Use items like old teapots, wooden crates, or even tin cans as unique planters for your herbs.
- Window Boxes: Attach planters to your windowsills for easy access and a beautiful display.
Creating a planter for herbs is a simple and enjoyable project that brings the beauty and utility of fresh herbs to your home. With the right materials, a bit of care, and some creativity, you can have a thriving herb garden that enhances your cooking and living space. Whether you’re an experienced gardener or a beginner, these tips will help you cultivate a lush and productive herb planter that you can enjoy year-round. Happy planting!
